User Manual
User Manual - Inventory
7.1) SKU Mapping
I) You can click on the red-highlighted "+ Add New" button to add a new product into the Inventory
II) You can also use the yellow-highlighted "View" Button to view and edit the information of the existing product.
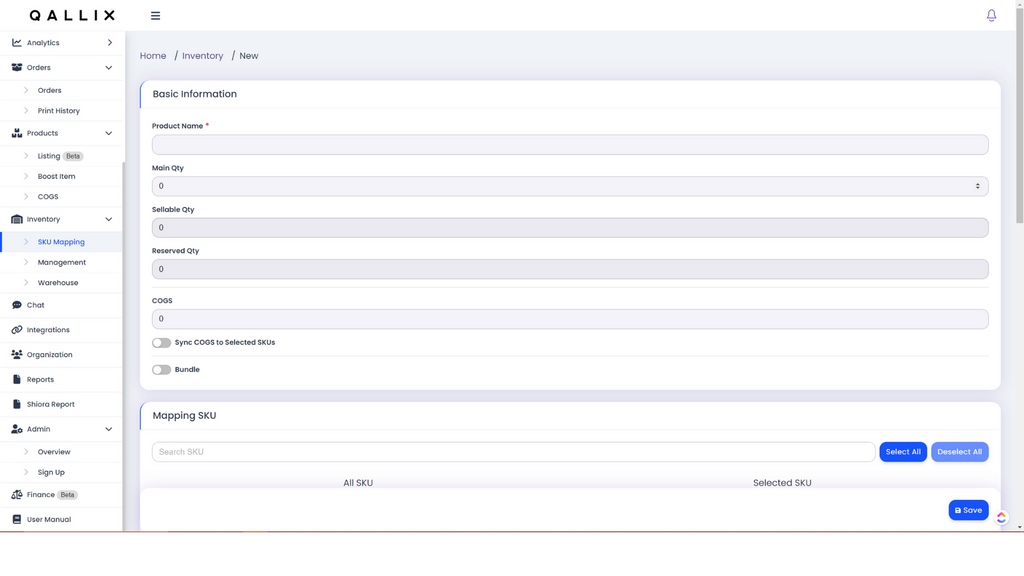
III) Enter the required information in the field above.
The "Sellable Qty" and "Reserved Qty" will be calculated for you once you enter the Main Qty. You will then be given the choice to Sync COGS to different SKUs.
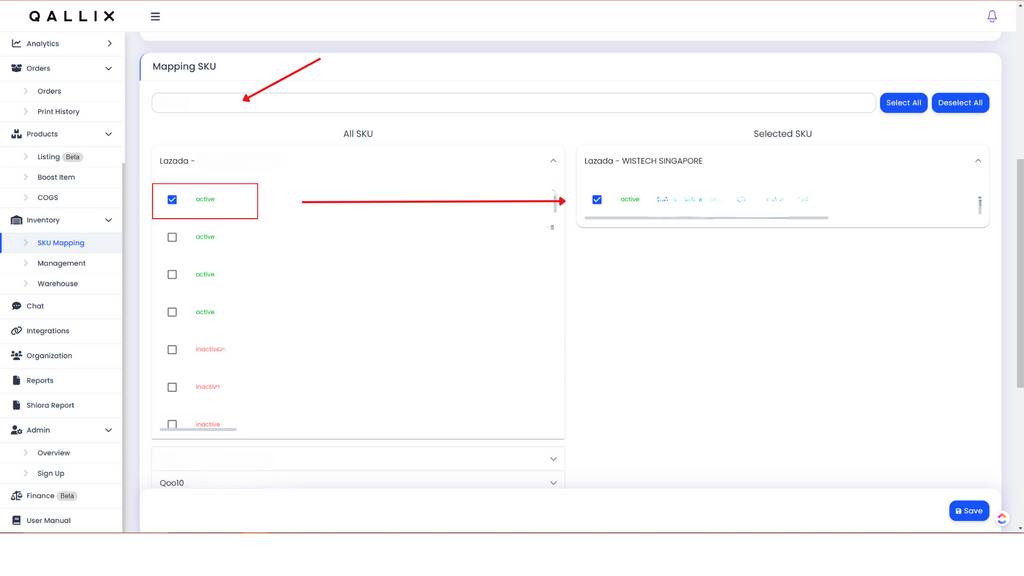
IV) Using the search bar that the red arrow is pointing to, you can search for different products and select all the SKUs that match with the product and it will be added to the Selected SKU column.

V) All the SKU information will then be added to this section that will include all the Item's Quantity and its Status.
Remember to click the blue "Save" button to add the Product to the Inventory.
7.2) Management
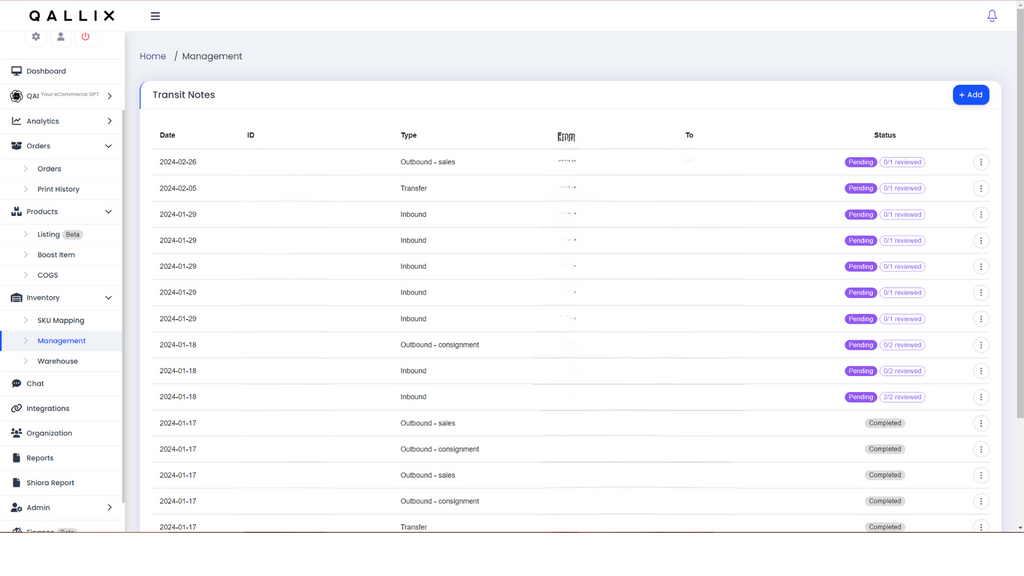
I) Using the Management Tab, you will be able to track when and where the different stock comes and goes.
II) You will also be able to view the status of the Transit of Stocks.
III) Using the blue "+ Add" button, you will be able to add a record to track the transit.
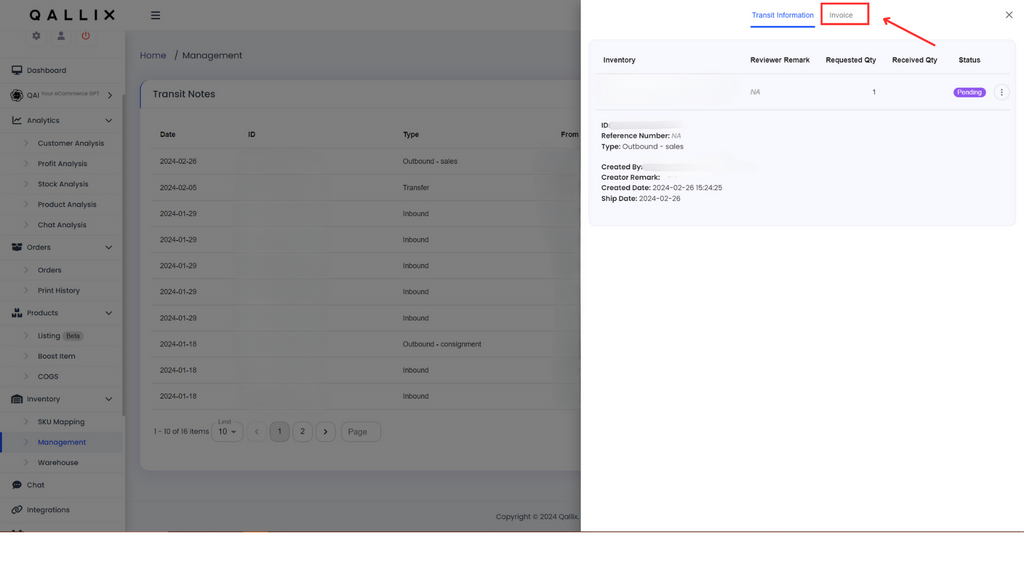
IV) You can click on each record to view more detailed transit information such as the inventory and any remarks made.
V) You can also click the red-highlighted "Invoice" button to generate a invoice which can be saved as a PDF.
7.3) Warehouse
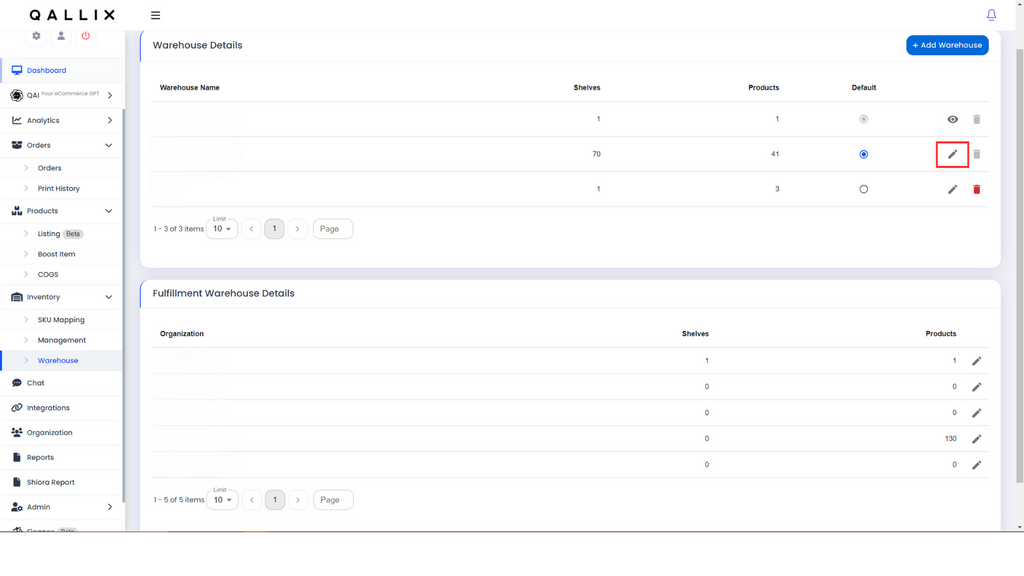
I) You can edit and add new warehouses and check the Fulfillment Warehouse details.
II) Using the red-highlighted button, you will then be able to edit the Warehouse details and view the different products that are in the Warehouse.